Today, we’re excited to announce theSelf-Hosted Environments Beta. We’ve learned from our customers that with the need for data security and compliance on the rise, building and maintaining environments and dependencies to support their existing DevOps processes and workflows is a non-trivial matter.
Currently, engineering teams must choose between speed and compliance. When building or modifying data infrastructure, this can mean lost time or potentially putting sensitive data at risk.
Self-Hosted Environments can now be provisioned with Meroxa in an existing cloud provider with just a few steps. Environments play a key role by encapsulating settings in an isolated subnet where data application resources can exist and operate securely. By sequestering development and testing efforts in environments as part of the DevOps lifecycle, engineers mitigate impact risk on existing systems and customers.
We’ve done the work to eliminate implementation complexity for our customers while still offering complete operational control over their data security, compliance, and performance needs.
Getting started
To get started,sign-up for the Self-Hosted Environments Beta.
A member of our team will reach out with the next steps. You will need access to your cloud provider to generate credentials with the necessary permissions to provision an environment.
In the meantime, request a demo of Meroxa to gain access to a Meroxa account.
With Self-Hosted Environments, you get all the power and utility of the Meroxa Platform. Allowing easy creation and management of Resources, Connectors, and Pipelines through our Dashboard or CLI — all with your data securely isolated in your cloud.
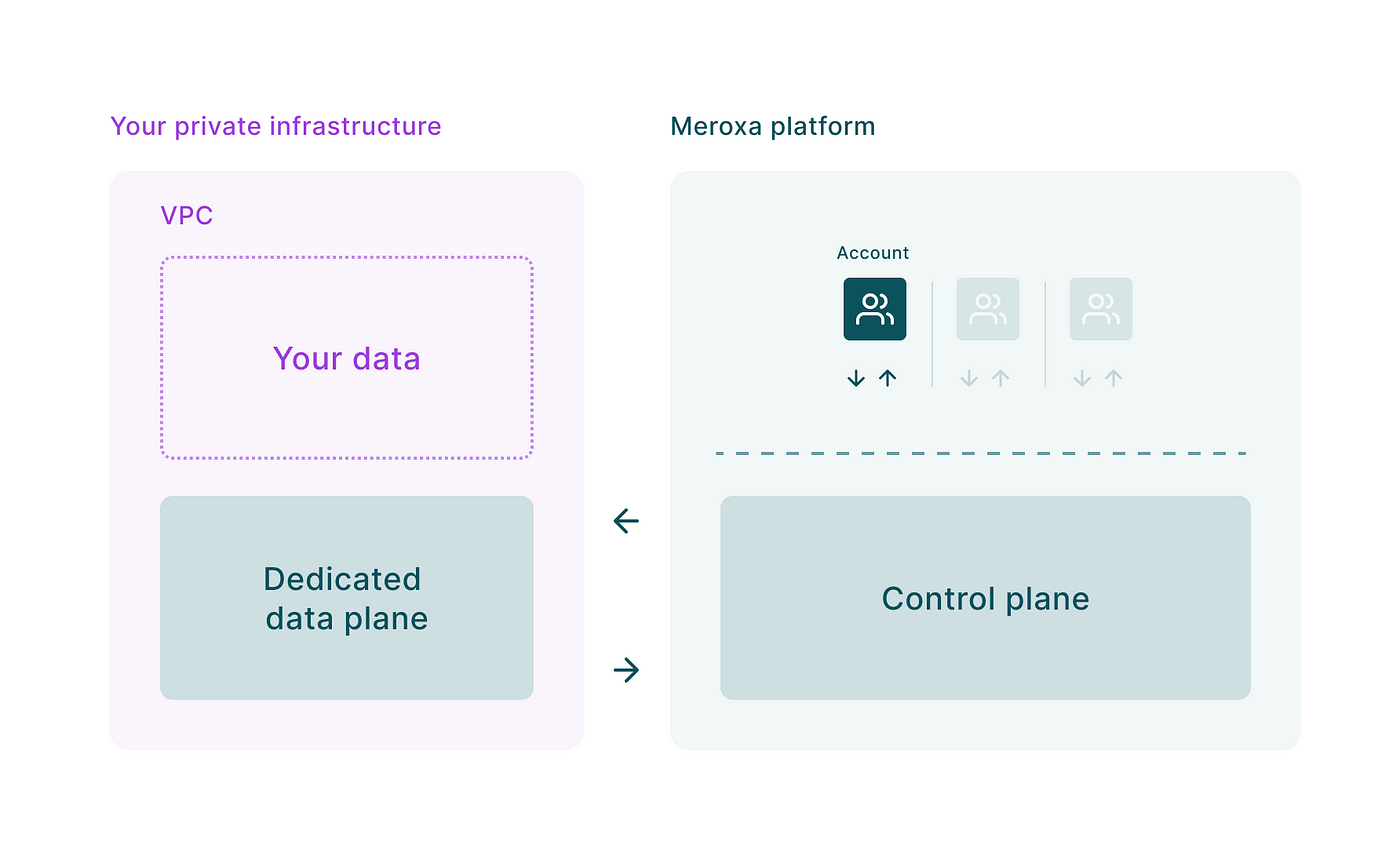
The Meroxa Platform performs a preflight check to verify permissions before generating a new VPC and the associated dependencies in your cloud. A secure remote connection will be maintained automatically with the Meroxa Platform for the control plane to ensure everything operates smoothly.
 To provision your Self-Hosted Environment, you will need credentials from yourcloud provider with the appropriate permissions.
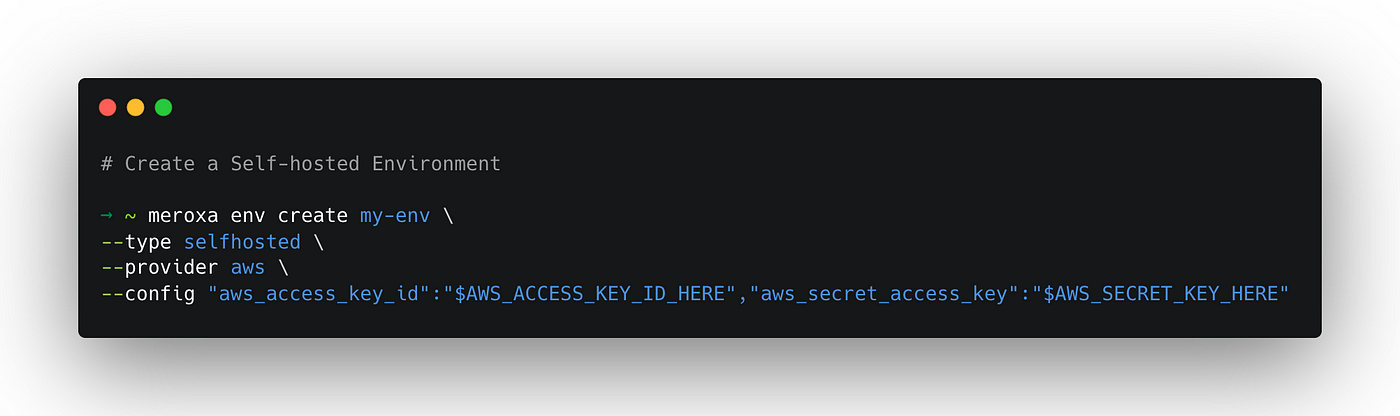
Creating Self-Hosted Environments is made easy through ourCLI. Simply name the environment, indicate the type, provider, and include the configuration that contains your cloud provider credentials. See ourdocumentation to learn more.
Once successfully provisioned, you are ready to start creating Resources, Pipelines, and Connectors to move your data within your Self-Hosted Environment.
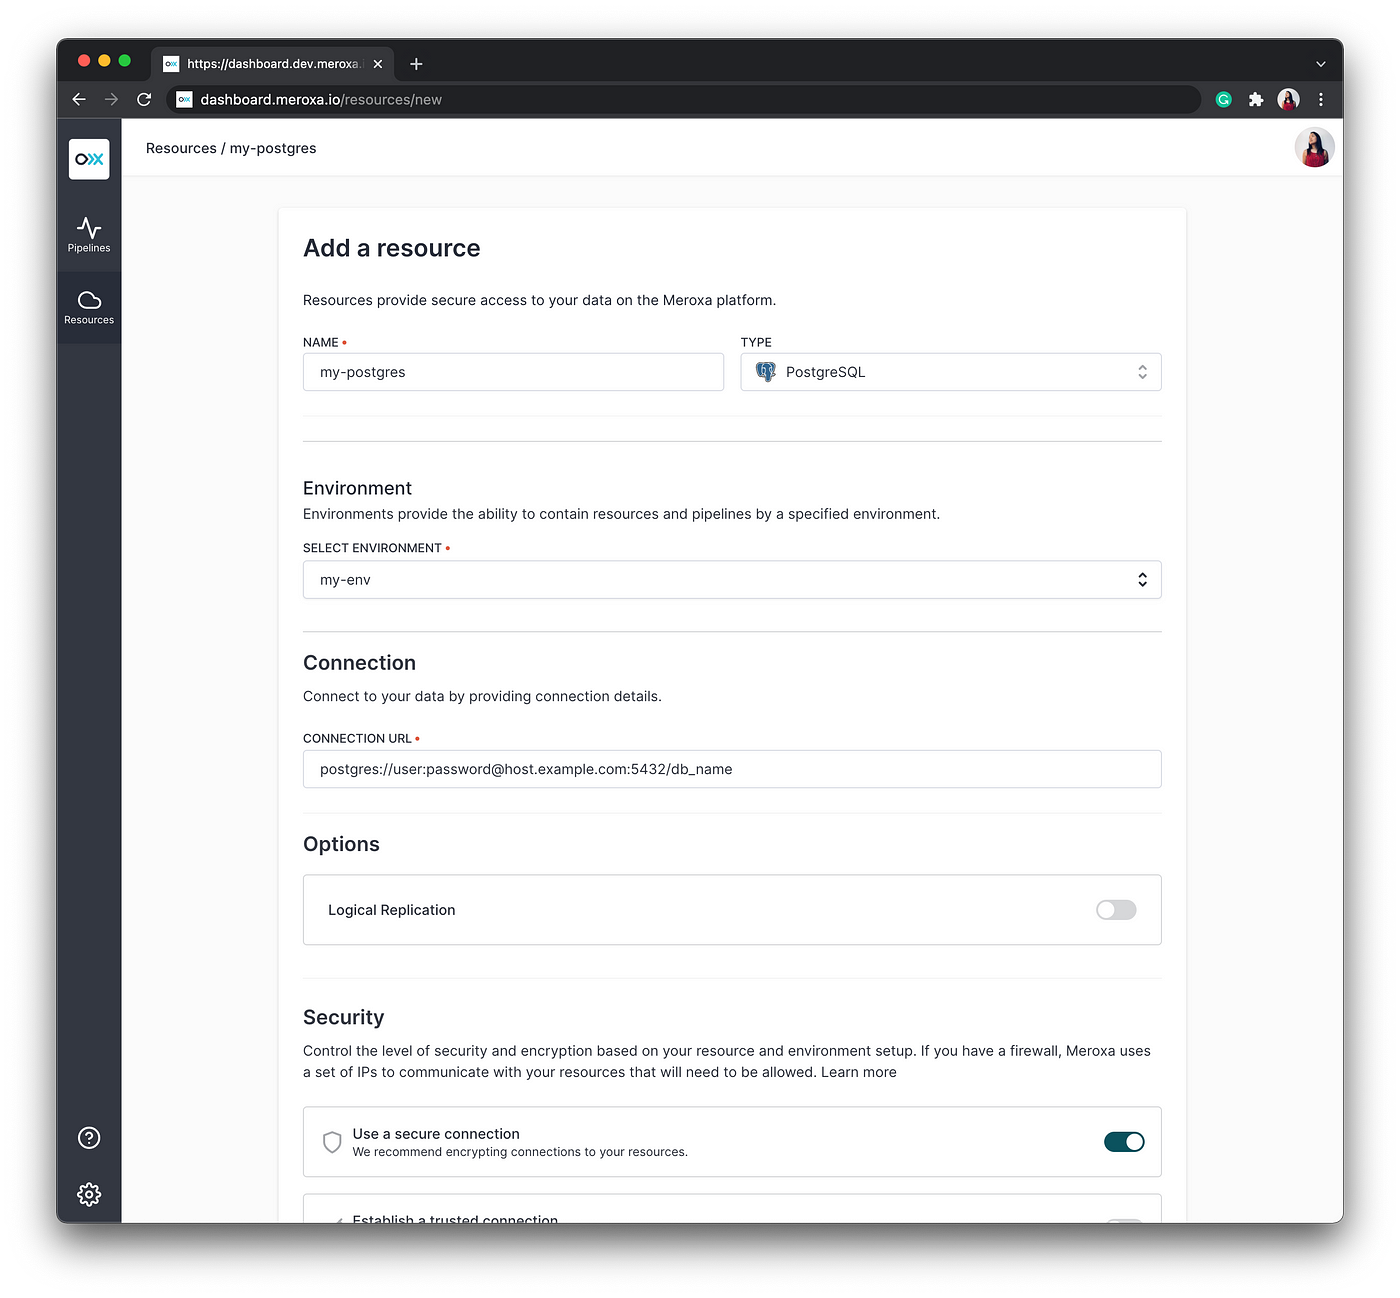
In the dashboard, you have the option to indicate which environment you’d like to create a Resource or Pipeline for by selecting the environment in the dropdown. The default environment is ‘common’.
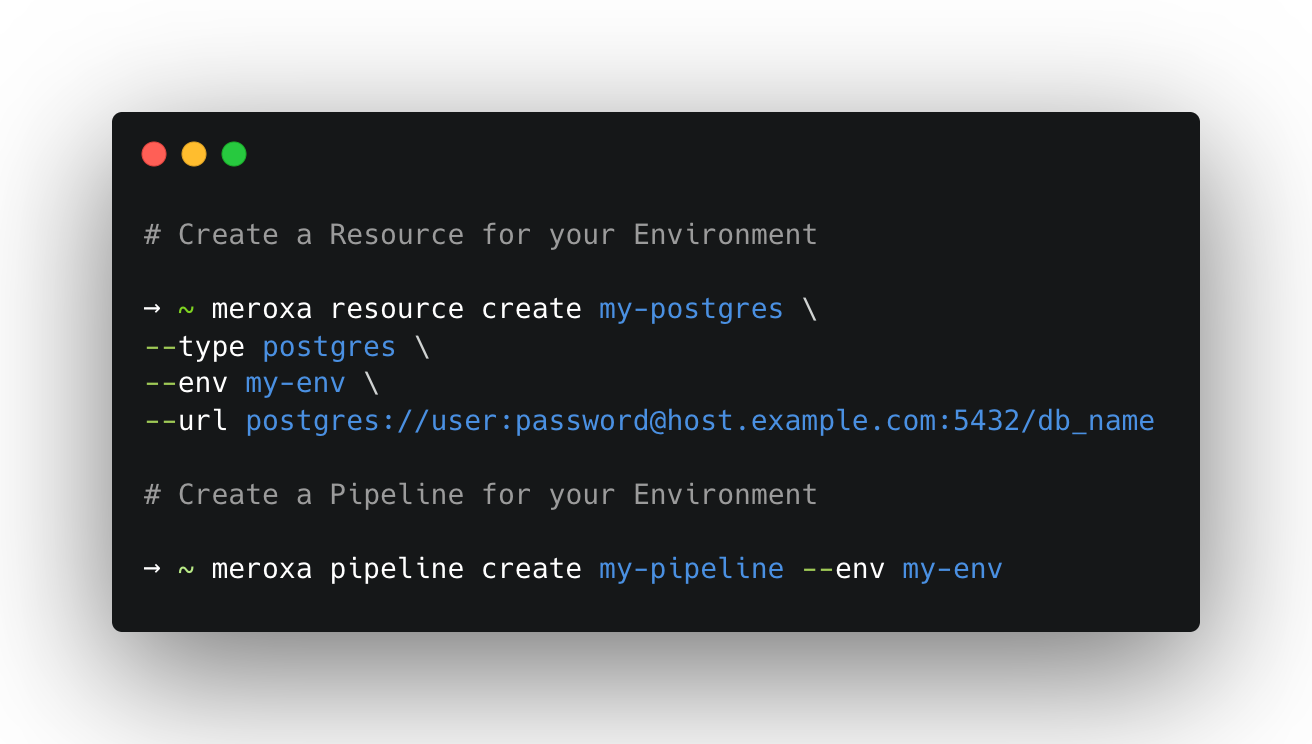
When using the CLI, you can indicate which environment you’d like to create your Resources or Pipelines by using the `env` tag followed by the environment name in the CLI command.
What’s supported
Self-Hosted Environments may be provisioned in the following Amazon Web Services (AWS) regions:
us-east-1(N. Virginia)us-east-2(Ohio)us-west-2(Oregon)ap-northeast-1(Tokyo)eu-central-1(Frankfurt)
We do not currently support the provisioning of environments within existing VPCs.
Don’t see your cloud provider or preferred region? You can stillsign-up for the beta — we’d love to hear how we might best support your needs!
Learn more
Are you as excited about real-time data applications as we are? We’d love for you to take Self-Hosted Environments for a spin. Sign-up for the beta today — we will be in touch with the next steps! For more details, see our documentation.
Sign-up for the Self-Hosted Environments Beta.
As always,
- You can reach us directly at support@meroxa.com.
- Join our Discord community.
- Follow us on Twitter.